I have a friend called Colin. Colin is a great bloke. Towards the end of last year, he came to me with a bit of a problem. It turns out he was having bother with his knob.
No, hang on, that doesn’t sound right.
OK, he was having trouble with his rusty ring.
No, no, that doesn’t sound any better.
OK, where to start. First things first, it isn’t strictly speaking Colin’s knob (or rusty ring).
If it’s anyone’s I suppose you’d have to say it’s God’s. Or, at least, it’s the property of God’s chosen and appointed religious representatives responsible for our local church. It’s the door knob you see. Or the door handle anyway, since it’s a knob on the inside (which is fine) and a rather nice forged ring on the outside (which is not).
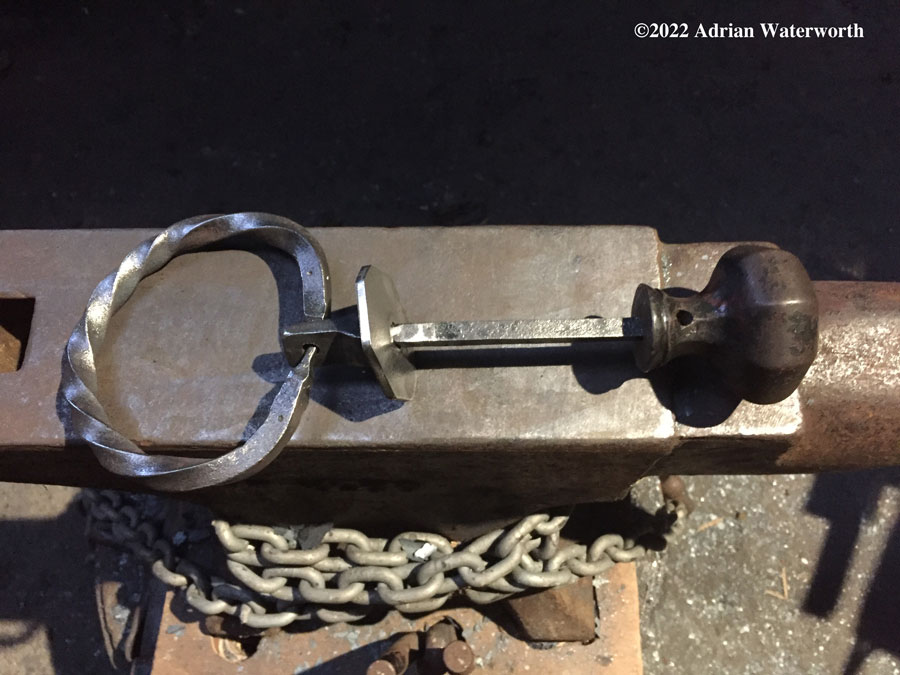
Years of use had seen the little piece of metal that holds the ring wear away to a sliver and then, ultimately, to nothing at all with the inevitable result that the handle had become detached altogether (see Exhibits A and B below).
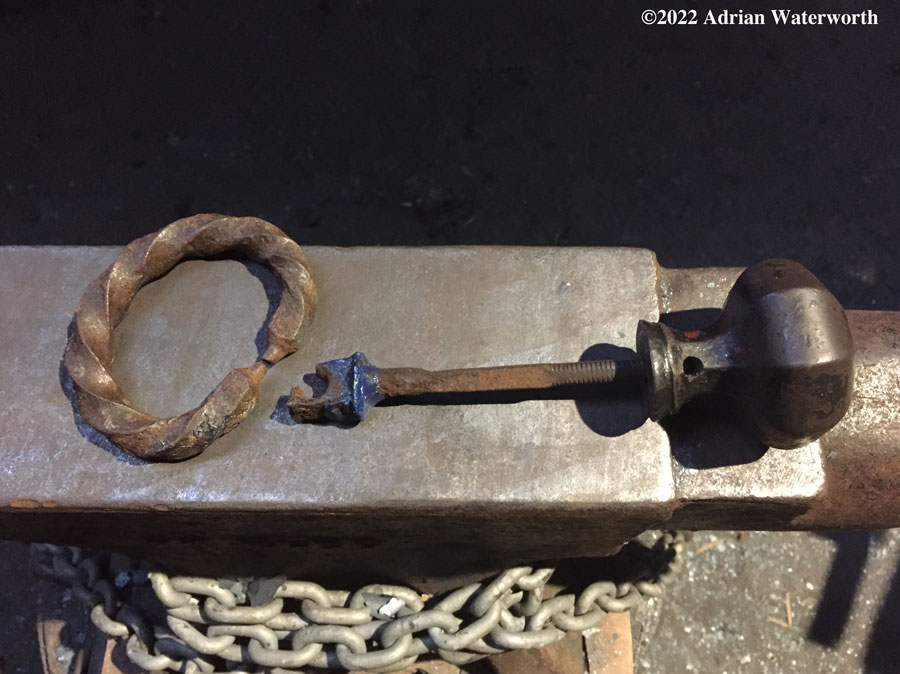
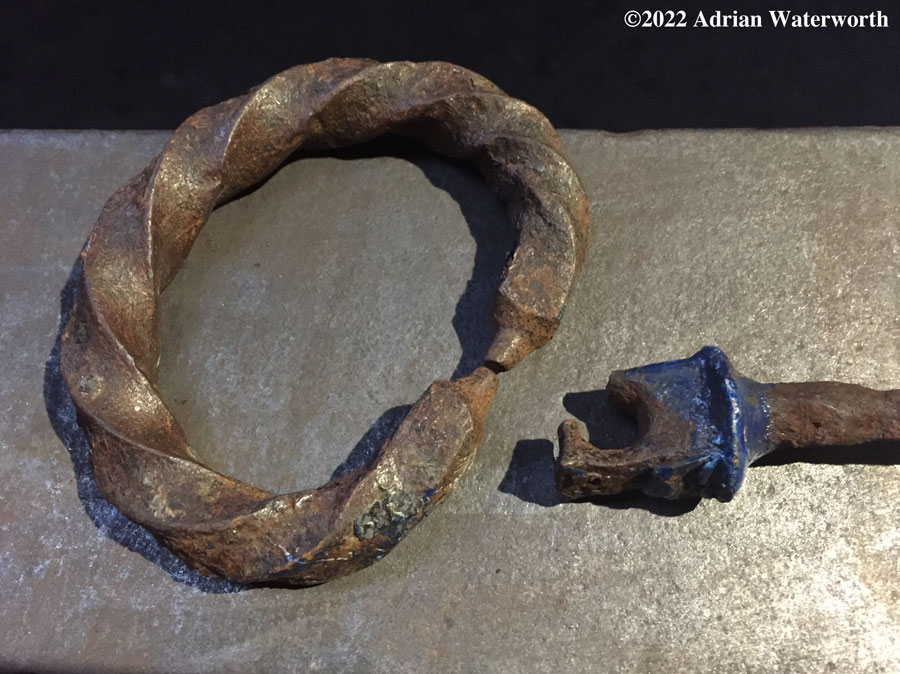
So, the question is, could your friendly local blacksmith-in-training fix it? At first, I thought I’d just cut the end off, forge a new piece to hold the existing ring and then weld that back onto the existing bar that goes through the door. Then I had second thoughts. And third thoughts. And maybe even fourth thoughts.
Step 1 – I’ll make an entire new bar to pass through the door. While secure enough, the existing one didn’t seat fully into the door knob on the inside. It was also looking a bit old and worn. Unfortunately, the smallest square bar that I had to hand was too big to fit into the hole on the knob. So an interesting exercise in delicate forging ensued as I had to take at least 150mm of slightly fatter square bar and consistently reduce its thickness by only a millimeter or two, while retaining its squareness. Normally you might do this with some kind of draw plate or rolling machine but I don’t have either so it was all done old-school with the hammer and anvil. Once done, I needed to drill a hole in the end in just the right place for the bolt that holds the knob onto the bar. This is a hole that is nearly as wide as the bar itself so this was a slightly scary bit – one slip with the drill and it would cut through the edge of the bar and I’d have to start all over. Thankfully, I managed it.
Step 2 – forge a new piece to hold the handle (ring). This involved starting with a thicker piece of square bar and then using a spring fuller and working it on the anvil to flatten the end evenly on both sides. Once flattened to the right sort of thickness, a hole could be drilled to take the ring. Then the new piece could be welded onto the end of the new bar. (Forging this was probably the easiest part of the whole process.)
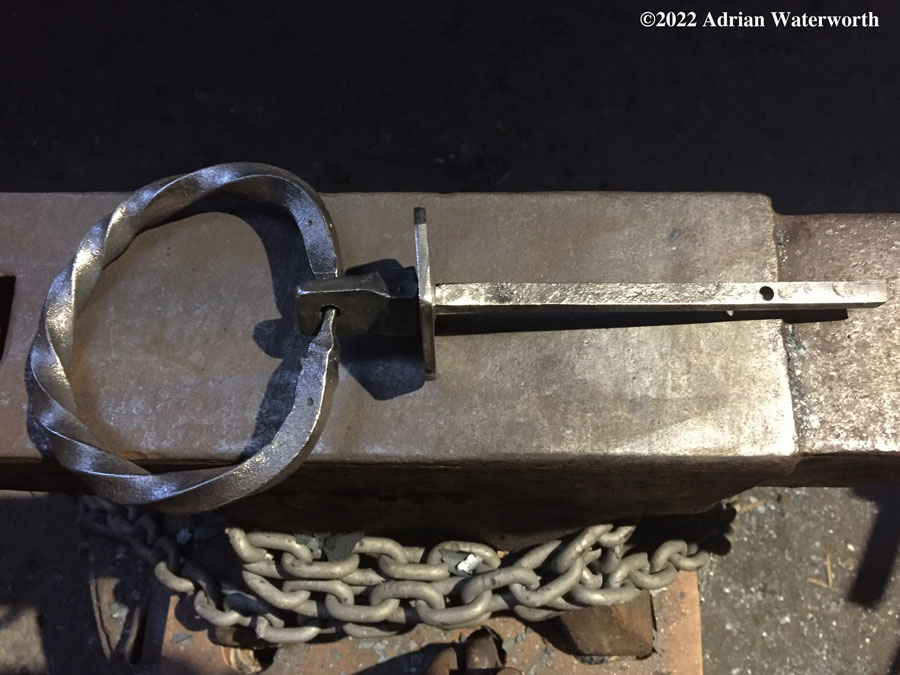
Step 3 – forge a new ring for the handle. The old one was a bit small, so I ended up making the new one a fair bit bigger as well so it’s easier to hold and turn. This was another little challenge as I first had to put a nice even twist along most of the length of 270mm of square bar. I then had to find a way to bend it into the right sort of shape without knocking the edges off the twist. This one, I admit, took two attempts to get right and finally involved making the twist in two separate sections that had to line up with one another. Slightly tricky but I got there. I also had to forge down the ends of the ring into little pointy things that would fit through the hole where it attaches to the door fitting.
Step 4 – after a visit to see the church door in question, I noticed that there is a rather large hole where the bar passes through the wooden door to reach the latch mechanism inside. So I’ll make a little back plate that fits onto the bar where it goes through the door and sits just behind the external handle (the ring). This was mainly just fabrication (cutting the plate) although I had to make the hole in the centre square so that it turns with the bar. That needed to be done with the metal hot and using a square punch but I didn’t have one. Luckily I’ve still got some lengths of tool steel in stock so a square punch was duly forged and then used to punch the hole in the plate. Result!
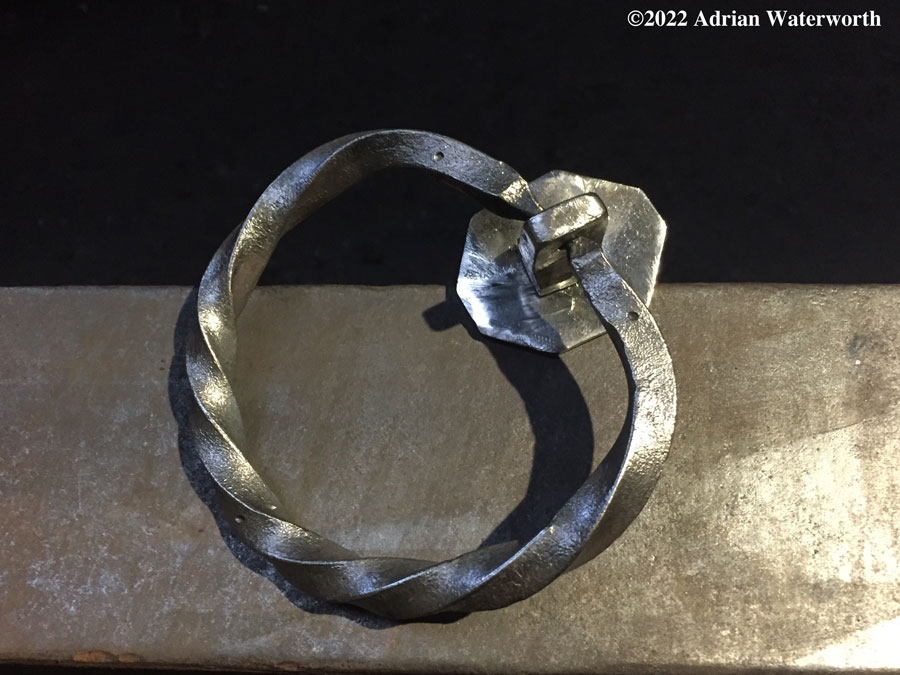
So, after two or three sessions in the forge (and, to be fair, quite a long while after Colin first asked me about it) the job was finally done.
If I’m honest and being my perfectionist self, there are several things that bug me about it. The shaping of the ring isn’t quite symmetrical, the ends of the ring aren’t quite the same and one of them got a bit bashed while I was forging it down. The welding where the ring holder attaches to the bar could also be a lot better (although it will thankfully be fairly well hidden once the whole thing is in the door). However, overall, I’m happy with how this has come together and, although I’m not really religious myself, it does give me pleasure to think that I’ve done something good for the church and the local community here. I’m also fairly glad I didn’t need to remake the door knob for the inside! The best way to make something like that is to cast it rather than forge it and I don’t have the wherewithal to start up a foundry and casting business alongside the blacksmithing. So the original door knob will still be doing its duty on the inside of the church door but everything else is new and, hopefully, will last as long as the original one did before someone has to fix it again one day.
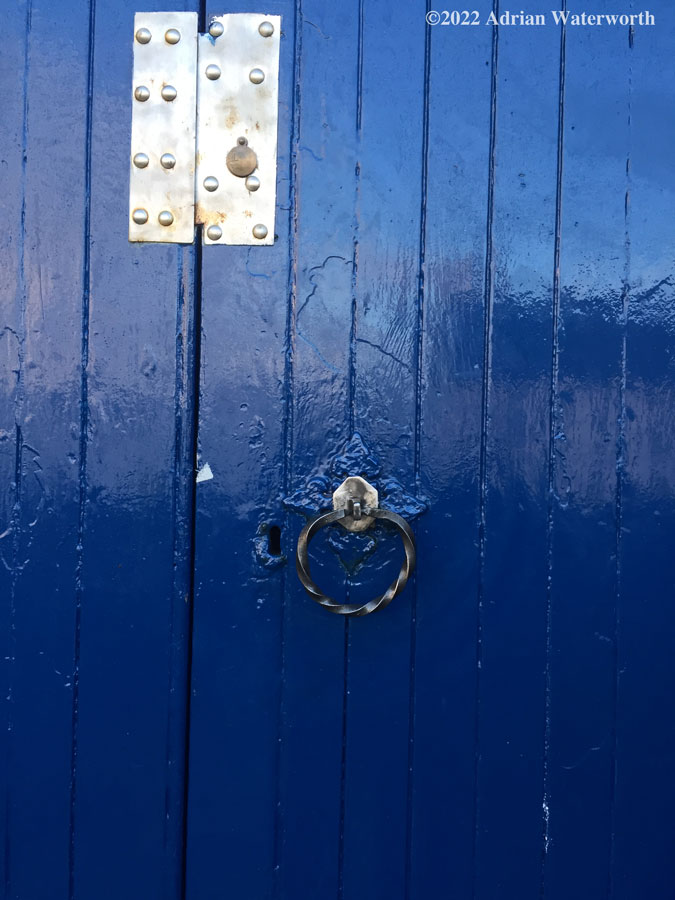
UPDATE: The new handle has now been fitted and, even if I say so myself, looks rather fine.

It looks great Adrian. You should advertise yourself as a Religious Knob Fettler.
That’s an interesting idea, but I’m not sure that it would necessarily attract the right kind of clientele!
Excellent work, sir!
Thanks Nick – it was a fun project to do and only involved a couple of occasional minor swears…
Great work working that knob. How about a photo of it in situ? I’d love to come over and get some photos of you at work in the forge mate.
Thanks Scott. I went down to the church and fitted it yesterday. I took a couple of quick snaps on my phone which I’ll add to this post.
Would be great to see you here sometime.